Arbrea Body uses a proprietary “Local AI” engine body simulator designed to deliver fast, realistic 3D simulations in real time.
Open Arbrea Suite #
Launch the Arbrea Suite app on your iPad to begin the simulation.
Click Training Hub or New Patient #
Begin by exploring step-by-step guidance to help you become familiar with each feature in the Arbrea Suite.
Why Is It Important?
Gives you a clear learning path and hands-on practice with all the tools.
Getting Started #
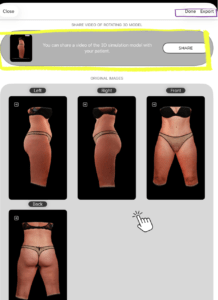
Once you’ve completed the simulation in Arbrea Body, you’re ready to share the results directly with your patient. Tap the Share & Archive tab at the bottom of the screen.
Accessing Screenshots & Gallery #
Inside Share & Archive, you’ll find:
- Screenshots – individual captures taken during the simulation session
- Gallery – a collected view of all your screenshots and any recorded videos from the session
 #
#

Selecting Content to Share #
Browse through the gallery and tap to select the screenshots or videos you want to share with the patient. You can select multiple items at once — for example, a before/after screenshot alongside a simulation video.
#
Exporting #
Once you’ve made your selection, you have two export options:
- Export as ZIP – bundles all selected files into a single ZIP file, ideal for sending everything at once via email or a file sharing platform
- Individual Export – exports each selected file separately, useful if you want to share specific images one by one
#

Tips #
- Take screenshots at key moments during the simulation — different angles, before/after views — so you have a rich gallery to share with the patient afterward.
- Videos are especially impactful for patients, as they can see the simulation from multiple angles in motion.
- The ZIP export is the most convenient option when sharing a full consultation summary with a patient.
Conclusion #
Arbrea Body allows you and the patients to visualize realistic body outcomes before the consultation, so patients are prepared to move forward.
